Step 1: Gather information for each user.
Each user has a set of credentials which will be needed to configure each phone. For each phone that you are configuring, obtain the following:
- SIP Address (Address of Record)
- SIP Password
- Auth Username
- Username
- Proxy/Domain
- Outbound Proxy
You can find this information in the user detail pages under the Users tab:
Step 2: Download ZoiPer from the App Store.
Step 3: Configure OnSIP Hosted PBX user account information.
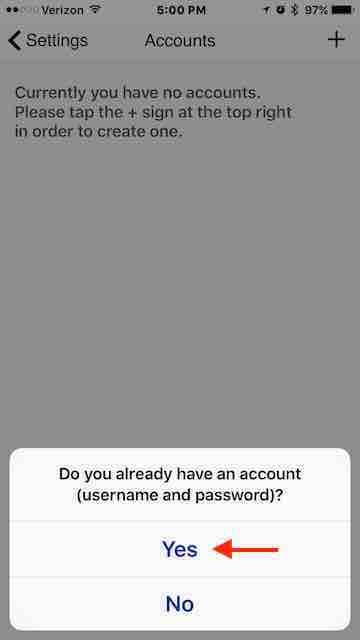
When you start ZoiPer for iOS for the very first time, it should automatically take you to the Account screen. If this is your first SIP account, you should see a setup wizard that looks something like the first image below.
Images are from ZoiPer 3.6.1 for iPhone / Library Version 35079
- Click Add Account + (if necessary)
- Do you already have an account > Yes
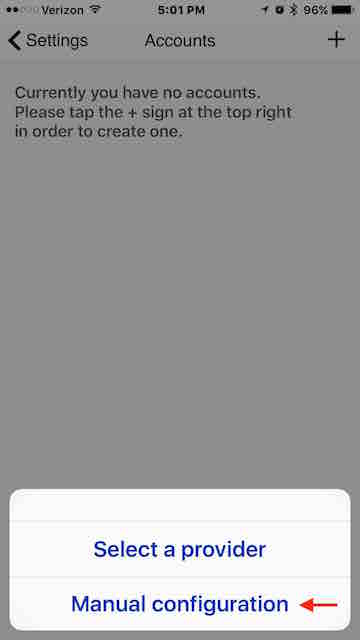
- Choose > Manual Configuration
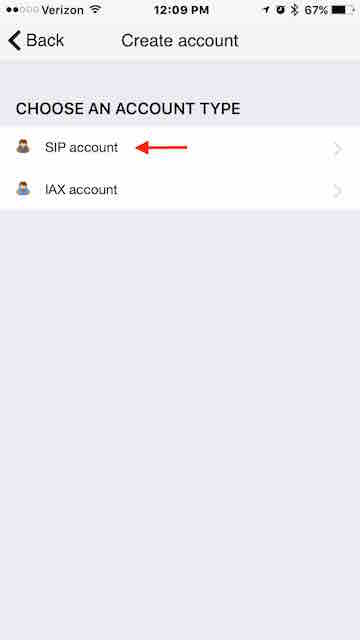
- Choose Account Type > SIP Account
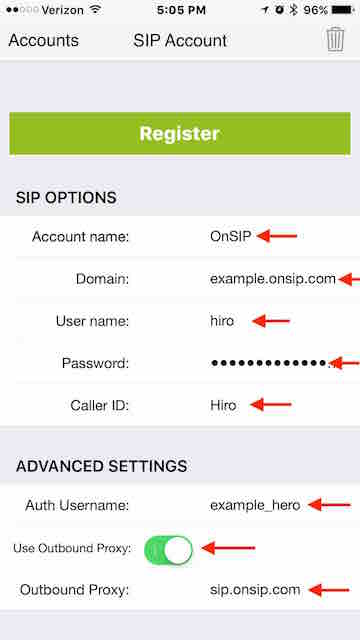
Enter in your credentials in the fields on these pages as follows:
- Account Name > OnSIP
- Host > Proxy/Domain
- Username > Username
- Password > SIP Password
- Auth Username > Auth Username
- Outbound Proxy > sip.onsip.com (turn on Use Outbound Proxy)
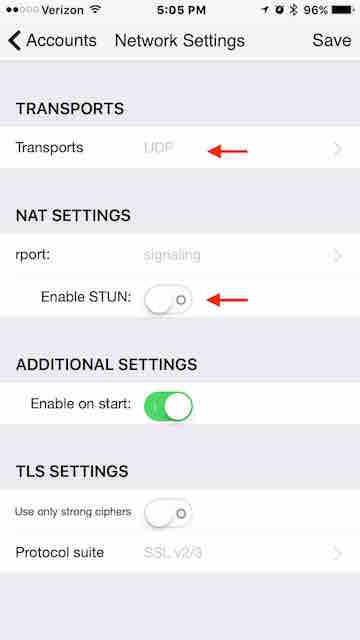
In the Additional Settings section, select Networks Settings and Disable STUN. The Transport setting should be UDP.
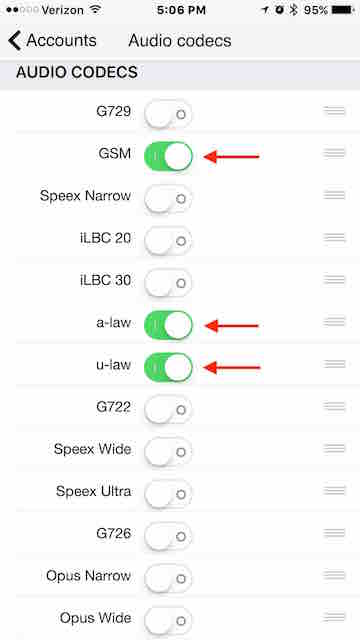
In the Additional Settings section, select Audio Codecs and choose GSM, a-law and u-law.
Device should display Registration Status: OK
Your device is now registered.
*Note: As of August 2024, the free version of the ZoiPer app does not include transfer, conference and all audio codecs.
Updated 0416
See our top business VoIP phone recommendations

Comments