Log in to the OnSIP Admin Portal. Left side of screen select "Group" and click "Create New Group."
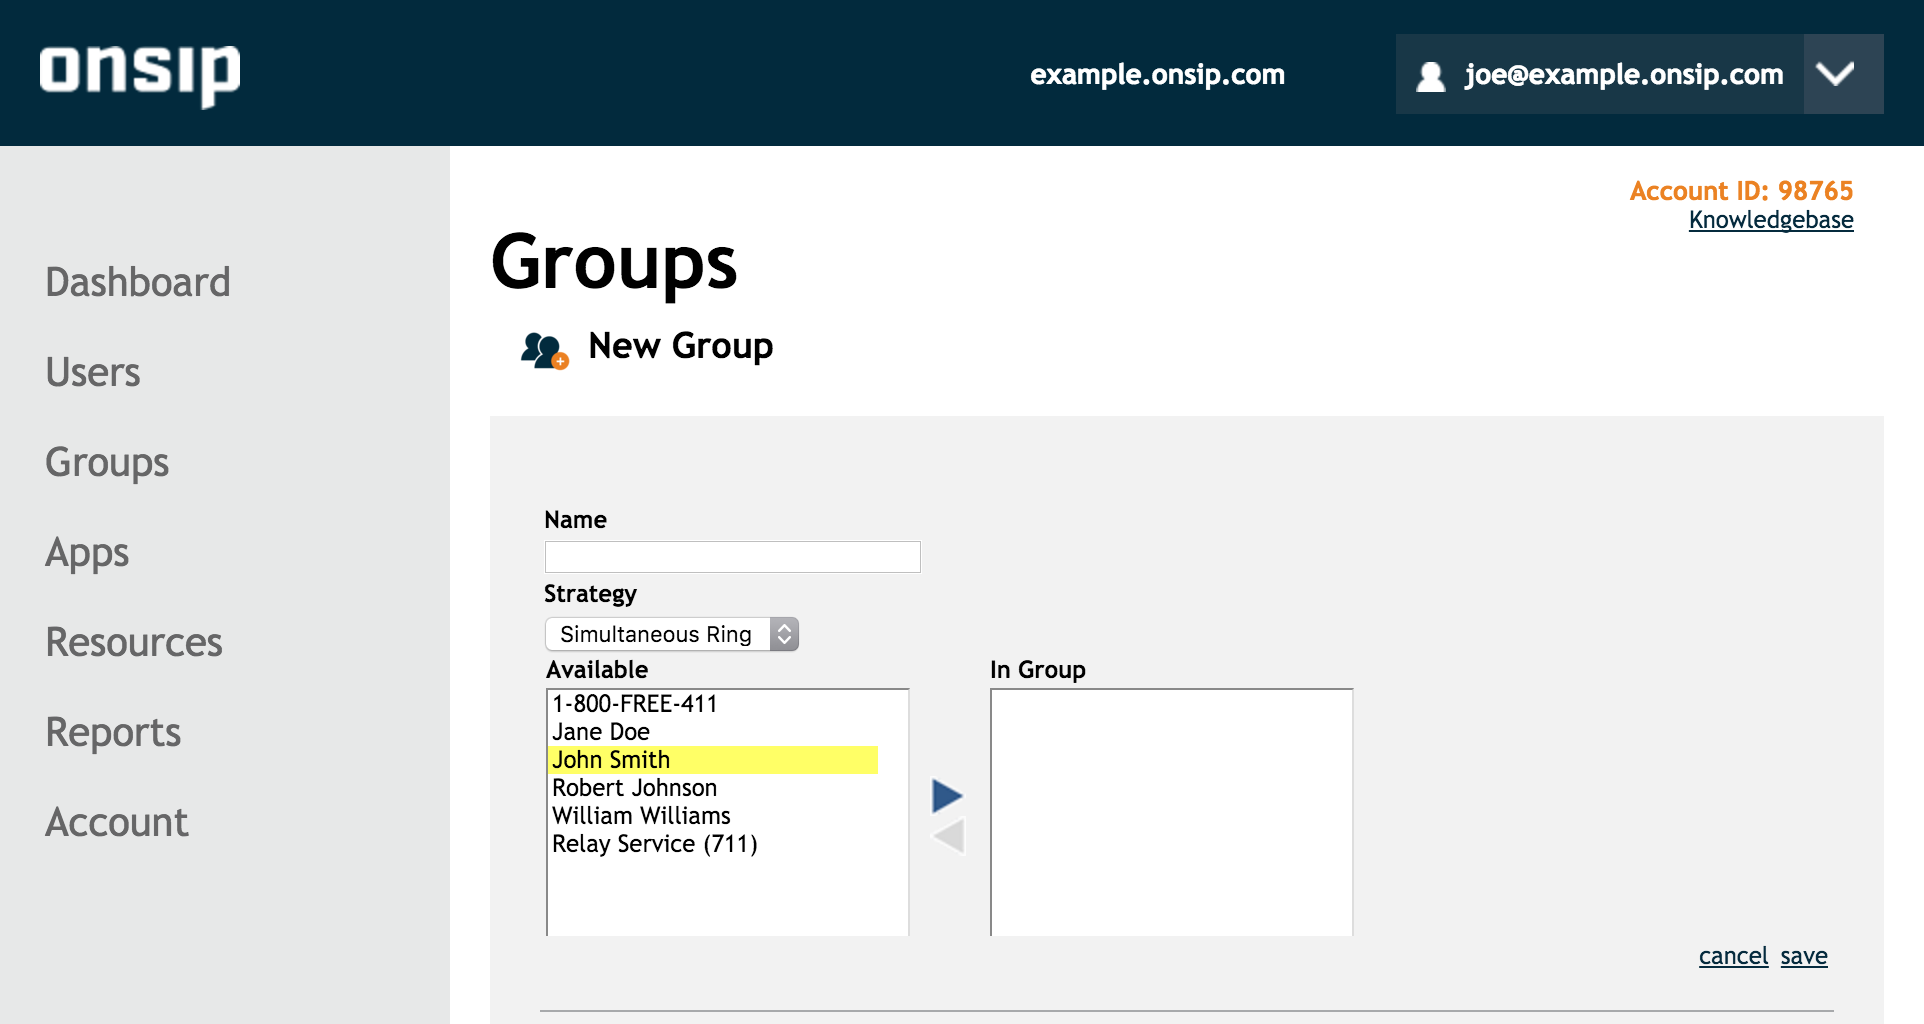
Enter the name of the group and select the ring strategy. Simultaneous Ring will ring all users in a group at once, while a Hunt Group will ring each user in sequence.
Next, add users to the group by selecting them in the "Available" list and moving them over to the "In Group" list by clicking on the right arrow.
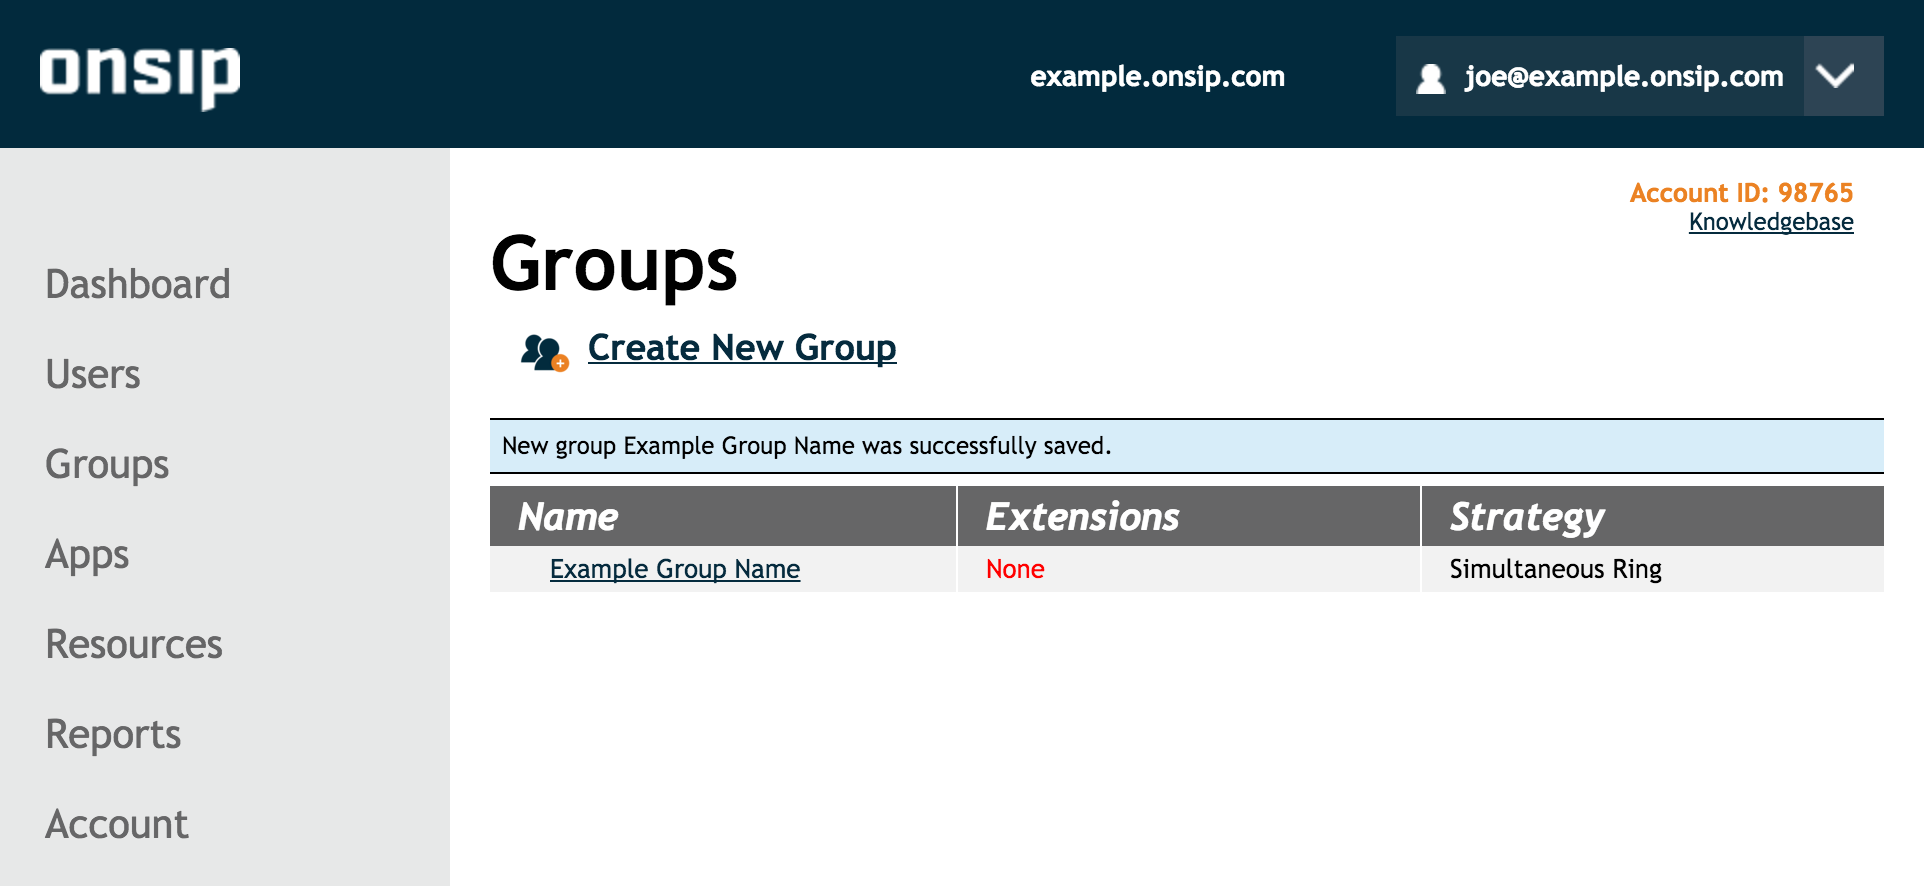
When you're finished, click "save" and you will see a note that says you have created a new group.
If you need to later modify your group, navigate to the "Groups" tab, and click the name of the group. You will be presented with the group's details.
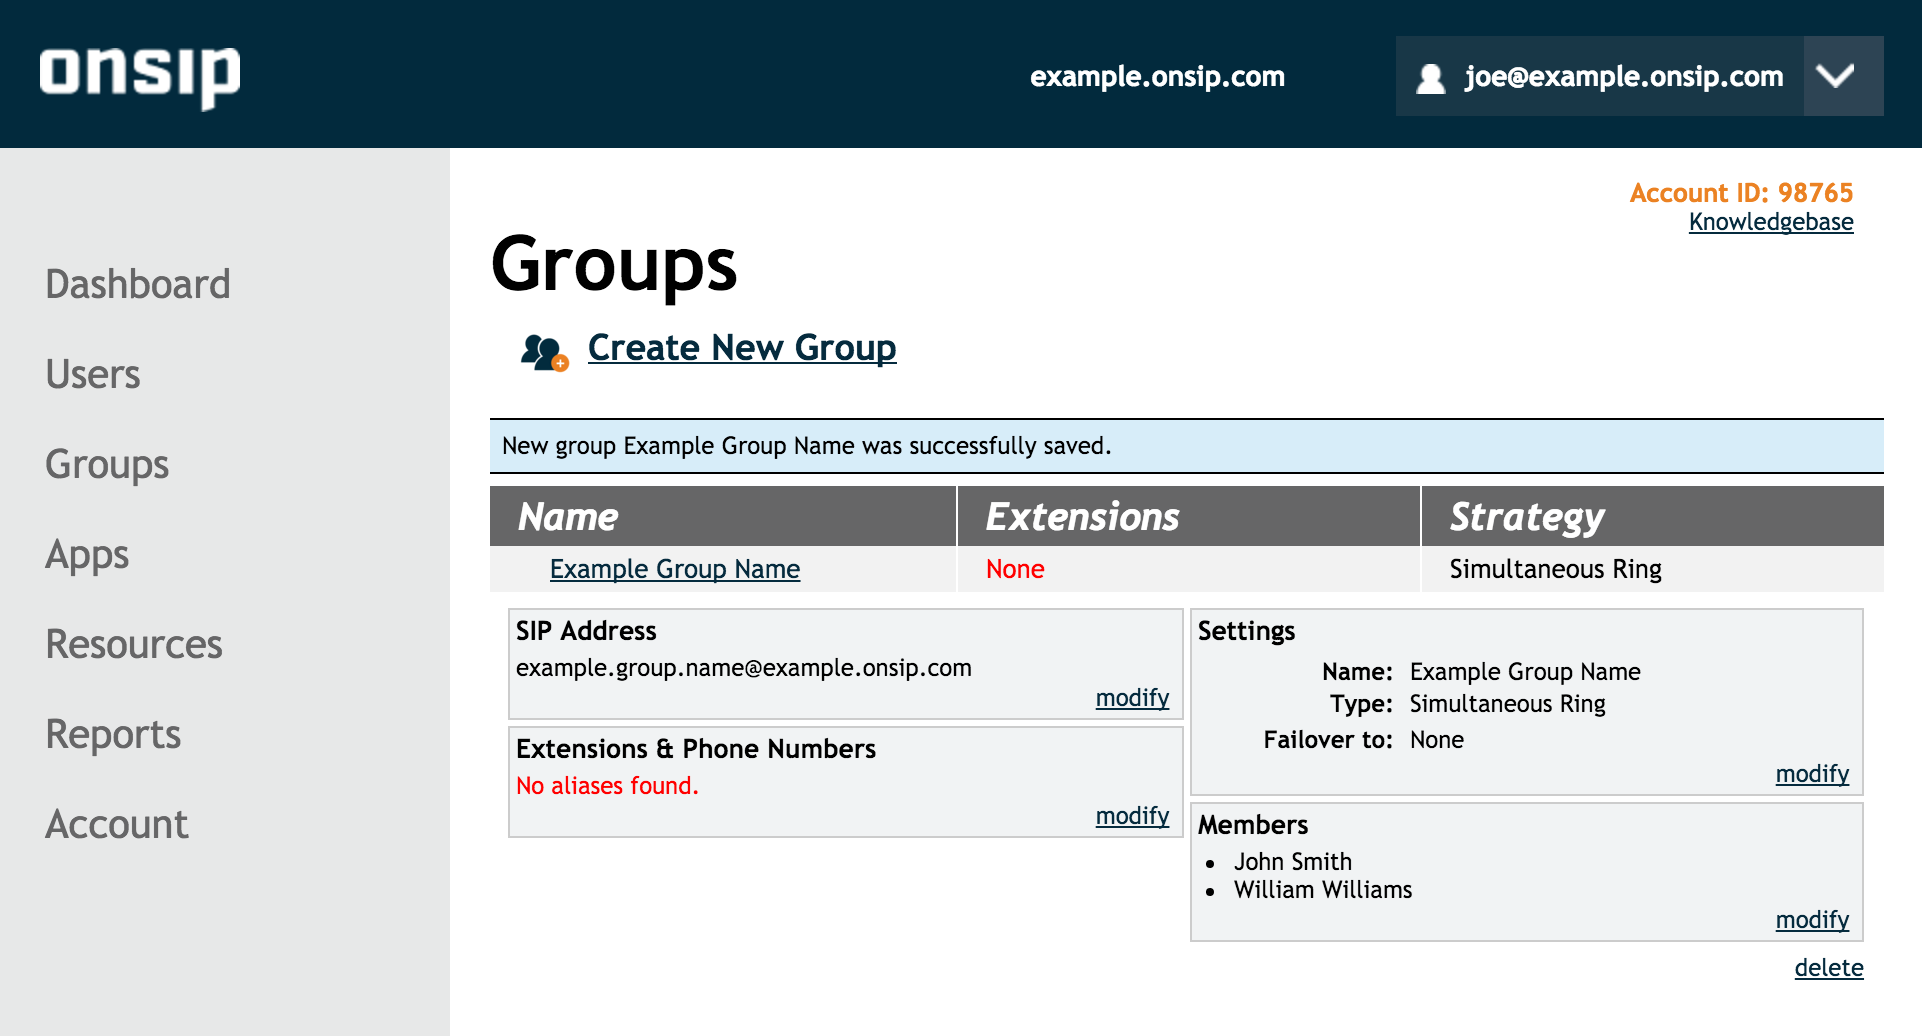
Click "modify" on any of the sections you wish to change or click "delete" to permanently delete the group. Please be careful when deleting groups, as they cannot be recovered.
Limits to Groups, see this link for Groups.
March 2019
Comments